| Project IIA |
Signature Style |
| Objectives |
studio fundamentals: To gain experience in working with various tools, mediums, gestures, and styles in order to extend one's expressive vocabulary and sense of design. concepts: To introduce the work of well known artists who employ a "signature style" through the marks they make. To show how the way in which we make marks in large measure determines our personal style. |
| Project Overview | Your challenge is to plan and execute a composition that reflects your attitudes to the question of "style." After exploring different tools, media, and gestures in a series of exercises, you will develop a work that creates a seamless transition between two different "signature styles." |
| Project References | --Discussion in 2D Unit II: http://www.asu.edu/cfa/wwwcourses/art/SOACore/markslive.htm |
| Vocabulary |
types of marks and lines: point, dot, mark, line, stippling, cross-hatch, calligraphic line, hand-writing, expressive line, mechanical or "ruled" lines, parallel lines, actual line vs. implied line, "psychic" line qualities/methods: hard-edged, smudged, bleeding, softened, transparent, opaque, blended, gestural/expressive line, even/uneven pressure, line weight, line quality, sumi-e, etc. tools: graphite (pencils, sticks), charcoal (compressed, vine, conte), india ink, felt-tip pen, Speedball pen, nibs, crow-quill, technical pen (e.g., rapidograph, ceramicron), stylus, ruling pen, fountain pen, silverpoint, calligraphy brush, sign-painter's brush, erasers of all kinds, finger, computer (viz. Photoshop). exercises: samplers, thumbnail sketches, doodles, |
|
Materials
|
biology paper and other papers, 15" x 20" cold press illustration board (student grade), x-acto knife, scissors, rubber cement or graphic arts paste, steel ruler, various mark making implements and media, xerox machine or computer with printer. |
| Process |
Preliminary: 1. Before coming to class, review the thematic concept of Identity as found on the website. Also read the discussion on "Marks and Lines" for Unit II. 2. Using the library or the Internet, research an artist that you feel has a strong "signature style." Good examples include Jackson Pollock, Mark Tobey, Helen Frankenthaler, Agnes Martin, Georges Seurat, Keith Haring, Pablo Picasso, Bridget Riley, Emile Nolde, Wassily Kandinsky, Kathe Kollwitz. If you prefer, look to various non-western cultural sources such as Australian Aboriginal painting or Japanese Sumi-e painting. The point is to immerse yourself and become "expert" in a particular approach to applying media to a surface. If you have a question about a particular artist's appropriateness for this assignment, see the instructor. Remember, we are looking for an approach to media--not particular content. And try to limit yourself to works in black and white. 3. Outfit your toolbox with as many mark-making tools that you can find. Don't limit yourself to conventional art supplies! Bring your materials to class to work...including your biology paper and other papers. Project: 1. Experiment! Using biology paper as well as other papers, try out different tools, various liquid media, and gestures. Vary your speed, pressure, the angle of the tool. Try to exploit the potential of the tool to its best advantage. How light a mark can you make? How bold and daring? Can you draw a perfectly straight line without a ruler? A right angle? A circle? Can you control your tool to create a series of parallel lines? Experiment with different hatching or stippling (shading) techniques to create varying degrees of density on your paper. Try making your own tools--like whittled sticks, pieces of a comb, carved erasers, or hand-made brushes. Dip them in india ink or paint, or use stamp-pads. 2. Develop a series of small non-objective drawings (approximately 6" x 6") that illustrate at least six different "styles" or approaches to creating marks and lines. Keep the designs simple--these little drawings should show off the quality of the marks and lines, not focus on "composition" or represention. Limit your designs to parallel lines, fields of marks, simple transitions, concentric rings, wave patterns and the like. This series will function as a "sampler" than you can refer back to. Mount the drawings on biology paper and put them in your notebook.
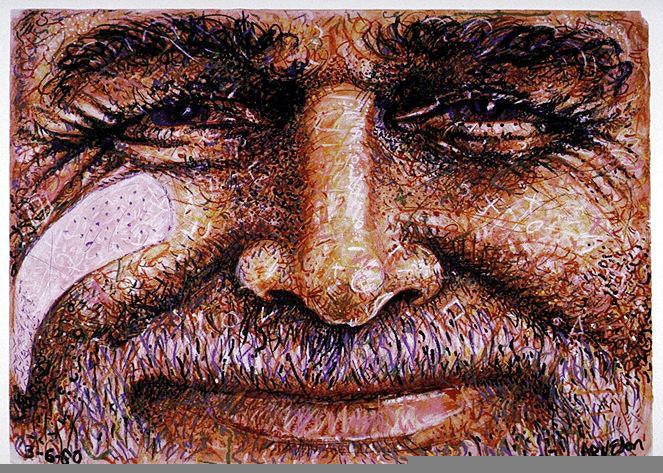
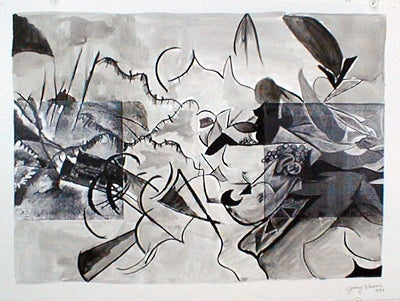
Student Example: Jenny Vicens 3. Create a composition using TWO stylistic techniques. Using a 15 x 20 board, you will be creating a drawing that provides a visual comparison between two well-known artists (or stylistic conventions). Your job will be to create a transition between these two styles to create a work of your own design. On the back of the board, paste copies of both original works in their entirety for reference. Starting from another set of photocopies or computer print-outs of the same images, crop the works such that a viewer's attention is focused on the abstract quality of lines and marks being employed. It may be necessary to change the scale of the artworks to be effective. This sounds nearly sacriligeous, but allow yourself to appropriate the artist's "signature style" markmaking technique. Consider their relationship from a compositional perspective. Now, you will be developing a composition that combines stylistic elements from each source image into a composition of your own design. You must use the full board (leave a one inch margin if you like...or, if you prefer, let the image "bleed" right to the edge). Don't be afraid to draw directly on your copies to practice. Select media and tool(s) that are suitable to blend with your chosen artists/cultures. |
| Assessment |
Entry-level performance (C): Did the artist explore a minimum range of tools and media? Does the final composition use two differing styles? Apprentice-level peformance (B): Wide range of tools and media explored. Exercises done with care and notebook effectively illustrates good range of experimentation. Artist demonstrates possibilites of mark-making through use of good design and/or strong expressive approaches. Evidence of careful research of artists/cultures. Final composition accurately reflects source artists/cultures and creates effective transition between two different styles. Professional-level performance (A): Exceeds expectations of assignment. Extraordinary level of creativity and/or technical achievement. Unusual conceptual twist. Boundary breaking. |
![]()